We have endless options for incredible trails to hike throughout the Canadian Rockies in winter. However, if you’re only visiting for a short vacation, you will want to hike the best winter trails.
Explore the suggestions below near Kananaskis, Canmore, Banff, Lake Louise, and Yoho National Park. You’ll find yourself hiking through beautiful snowy meadows on your way to alpine lakes and backcountry cirques. Discover frozen waterfalls as you walk through ice-filled canyons. Alternatively, climb a mountain where a coffee shop waits for you on the summit (along with a free gondola ride down!)
So, what are we waiting for now? Use the links below to navigate to specific areas covered in this guide:
Kananaskis Trails
Canmore Trails
Banff Trails
Lake Louise Trails
Yoho National Park Trails
Other Recommendations
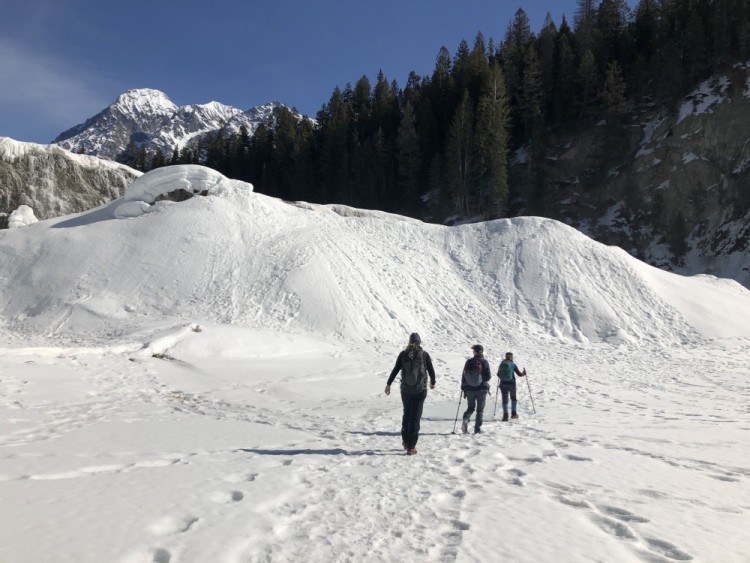
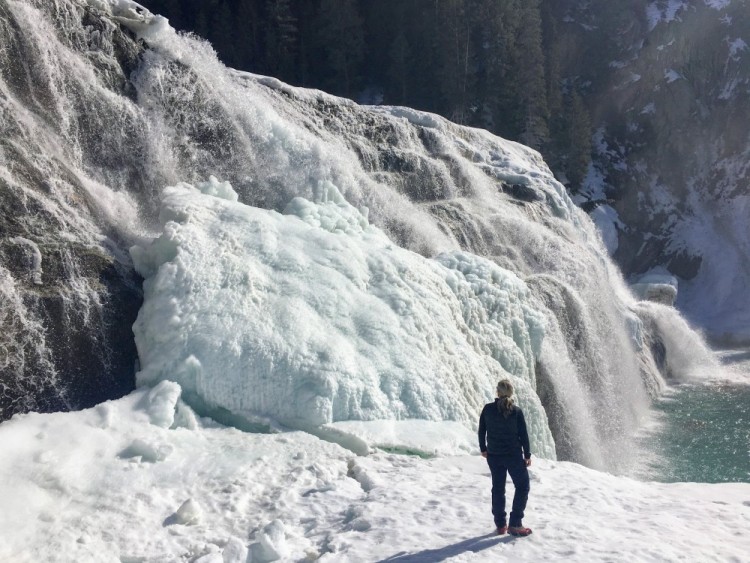
Wapta Falls is one of the great hiking and snowshoeing trails in the Canadian Rockies. Photo: Tanya Koob
Some of the links in this article may contain affiliate links. When you purchase using these links, part of the proceeds go to Snowshoe Mag. Additionally, as an Amazon Associate, we earn from qualifying purchases. Please see our disclosure for more details.
Winter Hiking & Snowshoeing Trails in Kananaskis
First, let’s start in Kananaskis, where you’ll find hikes to some gorgeous waterfalls and lakes!
This section includes the following trails:
1. Troll Falls and Upper Falls, Kananaskis Village
2. Rawson Lake and Upper Kananaskis Lake, Peter Lougheed Provincial Park
3. Chester Lake, Peter Lougheed Provincial Park
4. Rummel Lake, Spray Valley Provincial Park
1. Troll Falls & Upper Falls, Kananaskis Village
Length: 1.7 km one way (1 mi) to Troll Falls, 6 km (3.7 mi) to Upper Falls round trip
Difficulty: Easy
Troll Falls is the perfect family-friendly hiking trail. You won’t need anything other than a pair of winter boots most of the time unless the trail is especially icy. For icy conditions, bring along a pair of Kahtoola microspikes.
Additionally, you’ll share the trail with cross-country skiers, so it’s requested that you stay out of the ski tracks. Also, step to the side if you see a skier coming down a hill towards you. The trail also sees fat bike use and is a popular outing for those wanting to get a feel for their snowshoes on a wide gentle path.
The waterfalls are absolutely spectacular in winter, and if you have ice cleats or spikes, you can climb up behind them. Children will enjoy crawling behind ice curtains near the ground, and you’ll often get to watch ice climbers in action.
Read More: How To Plan a Snowshoe Outing With Kids
Additional trail tips for Troll Falls
If you choose, you can extend your hike with a trip to the Upper Falls. Backtrack a short distance from Troll Falls, heading back the way you came until you reach a signed junction for the Upper Falls.
You’ll cross a small bridge and climb steeply uphill. Here, you’ll want spikes or ice cleats until you reach a beautiful set of two-tiered waterfalls, the Upper Falls. Then, unless you know the area well, return the same way you came once you’ve reached a sign at the trail’s end.
For more information on all trails in the Kananaskis Village area, stop at the Kananaskis Visitor Information Centre, which you’ll pass driving out to the Village. Here you can pick up maps and find out what would suit your group.
Read More: 10 Snowshoe Adventures To Try This Winter in the Canadian Rockies
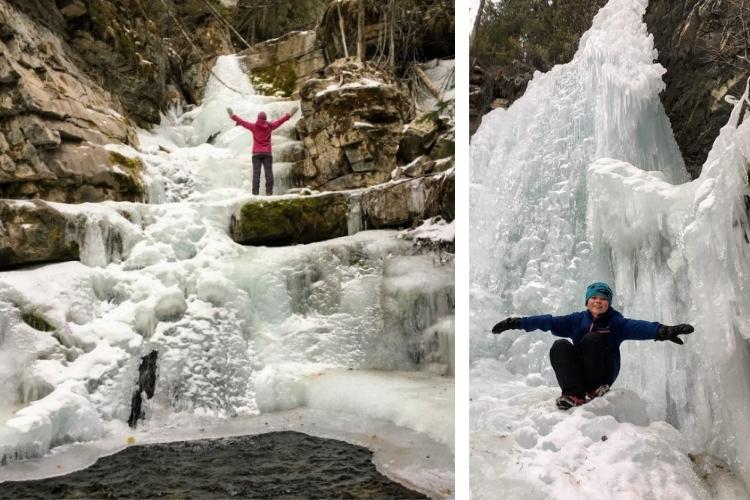
L: You can extend your trip from Troll Falls to Upper Falls. R: Children can have a fun time playing by ice curtains near the ground. Photos: Tanya Koob
2. Rawson Lake and Upper Kananaskis Lake, Peter Lougheed Provincial Park
Length:8 km (5 mi) round trip
Difficulty: Moderate
Further along Highway 40, you’ll come to Peter Lougheed Provincial Park, where dozens of snowshoe trails exist. Stop in at the PLPP Visitor Centre to pick up a trail brochure and get suggestions for the current conditions.
Rawson Lake Trail is my favorite of all the Upper and Lower Kananaskis Lakes trails. Plus, you can reach the lake in an 8 km (5 miles) round-trip hike.
You’ll gain 320 metres (1050 feet) of height, but the trail never feels overly steep. Instead, the trail gets well packed down and is always wide enough that you shouldn’t fear getting lost in the snow.
The first 1.2 km (0.7 miles) takes you along the shore of Upper Kananaskis Lake on the scenic Lakeshore Trail, where you’ll pass by Sarrail Falls on a wooden bridge. Once you get to the junction of Rawson Lake, the trail begins to climb for the final 2.7 km (1.7 miles.)
Read More: Winter Exploring in Alberta’s Provincial Parks
Additional trail tips for Rawson Lake
Enjoy the stunning scenery at Rawson Lake, but don’t go any further once you reach the lake, or you’ll be in avalanche terrain. If you have eyes on Sarrail Ridge, plan to return in the summer.
I recommend bringing snowshoes for this hike, and if you don’t need them, you can strap them to your backpack. However, you’ll definitely want them once you arrive at the lake if you step off the main trail.
Read More:8 Backpacks for the Snowshoer
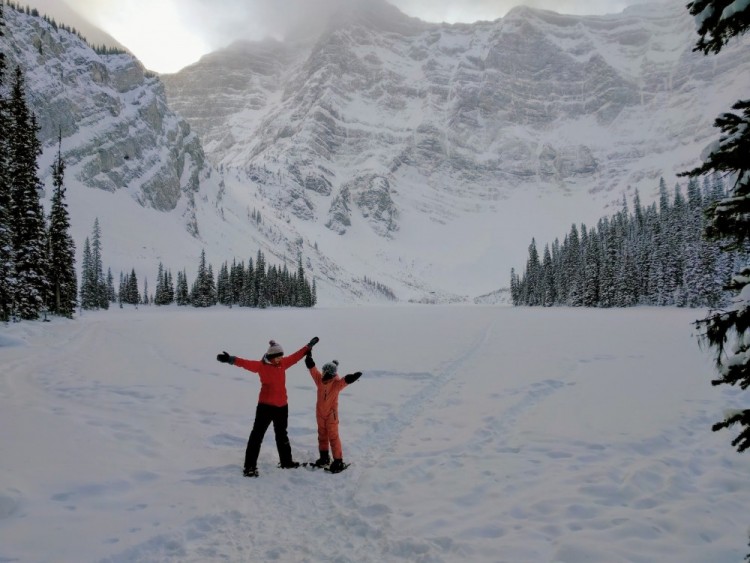
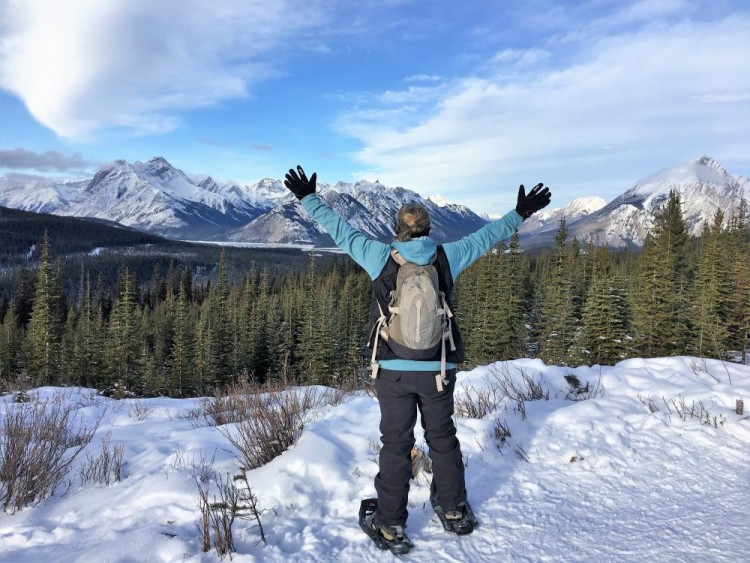
The Rawson Lake area is perfect for snowshoeing! Just be wary of avalanche terrain if you go past the lake. Photo: Tanya Koob
3. Chester Lake, Peter Lougheed Provincial Park
Length: 9.2 km (5.7 mi) round-trip
Difficulty: Moderate
Chester Lake is a multi-use winter area with a designated snowshoe trail and a separate backcountry ski trail. Please use the snowshoe trail if hiking, even if the ski trail appears to be more packed down.
The hike to the lake is 9.2 km round-trip (5.7 miles) with 300 metres of height gain (984 feet.) To reach Chester Lake from the Upper Kananaskis Lake area, turn on Spray Lakes Road, Highway 742, which will take you into the Spray Valley. You can also access this highway from Canmore.
I honestly believe this is one of the most beautiful snowshoe trails in all Kananaskis and Banff combined. Even with children, the distance is doable, and the trail grade is never overly steep. You’ll get a workout climbing to the lake, but you shouldn’t feel like you’re climbing a mountain.
Before you reach the lake, you’ll be rewarded with an amazingly scenic walk through alpine meadows. This beautiful walk is the trip’s highlight. Even if you only get this far, it’s still worth it.
Read More: Escape to Snow Paradise in Kananaskis, Alberta
Additional trail tips for Chester Lake
If you go the total distance to the lake, make sure you don’t start climbing slopes beyond the lake, or you’ll be in avalanche terrain. Stay on the lakeshore, and you’re fine.
Make the trip more comfortable with children and bring a sled (like this one). We towed a sled behind us when our son was younger and told him that if he made it to the meadows, we’d let him ride down. My husband guided the sled from behind, driving it in front of him with a rope. I’d recommend helmets for this wild ride through tight trees.
Also, you’ll want snowshoes for this trail. The Spray Valley receives a tremendous amount of snow in winter.
Read More: 10 Tips for Making Snowshoeing Fun with Kids
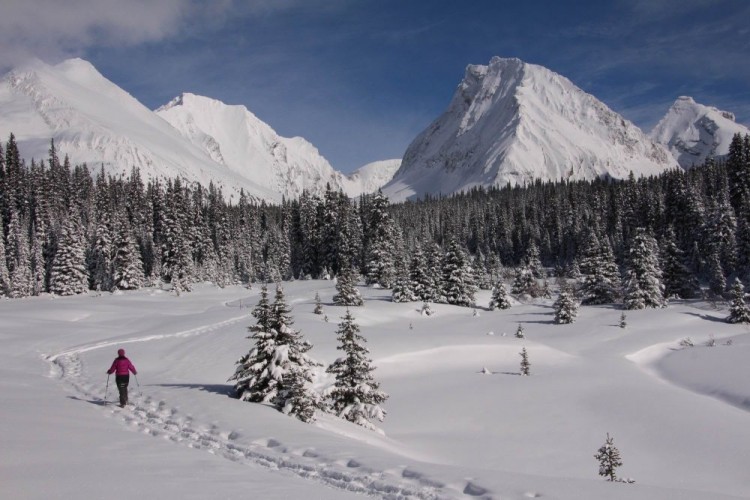
The Chester Lake Trail is one of my favorite hikes in the Canadian Rockies on a clear day. Photo: Tanya Koob
4. Rummel Lake, Spray Valley Provincial Park
Length:10 km (6.2 mi round-trip)
Difficulty: Moderate
Further along Highway 742, you’ll come to the turn for Mount Engadine Lodge. Park on the right-hand side of the highway if coming from the south, and you’ll be able to see a well-packed trail climbing up the bank.
This unofficial trail takes you to a beautiful bench looking over the Spray Valley. Beyond, you can access Rummel Lake, where there is a backcountry campground for winter use.
You’ll hike 1.8 km (1.1 miles) to reach the bench, gaining half of your total height. The total height for the entire trail is 421 metres (1381 feet). Turn left on the High Rockies Trail from the bench until you come to the junction with the Rummel Lake Trail. The trail is more gradual from this point on.
Read More: Winter Camping Checklist: What To Bring on Your Trip
Additional trail tips for Rummel Lake
If you’re staying at Mount Engadine Lodge, this is the closest and best hike you can do from the lodge, returning in time for afternoon tea. I also love the views from the bench looking over the valley, and the trail is much less crowded than the ones to Rawson or Chester Lake.
This is your trail if you want a more remote/backcountry hike!
Stop hiking when you reach the lake to stay out of avalanche terrain. I highly recommend snowshoes for this trail. You can always strap your snowshoes to your backpack if it’s well packed down.
Read More: Choose Your Overnight Canadian Rockies Adventure This Spring
Winter Hiking & Snowshoeing Trails Around Canmore
Hike the peaks and canyons in Canmore.
This section includes the following trails:
1. Ha Ling Peak
2. Grassi Lakes
3. Grotto Canyon
1. Ha Ling Peak
Length:8 km (5 mi) round-trip
Difficulty: Moderate- Difficult
The Ha Ling Trail (temporarily closed due to damage) in Canmore climbs 800 metres (2600 feet). Bring good ice cleats or Kahtoola Microspikes with you for this one. I also highly recommend a pair of trekking poles (check out these 8 options) to help with balance on the final scramble to the summit.
The Ha Ling trail is well-maintained for the first 3.5 km (2.2 miles) to the saddle, where you can look down over the Town of Canmore. Challenging sections have had wooden staircases built to make the ascent more manageable and prevent your bum from sliding on the descent.
However, the final 400 metres of distance (0.2 miles) climbs 100 metres of height in a rough scramble through uneven, loose rock. Either turn around at the saddle or carry on if you have spikes and experience hiking rough terrain.
Read More: Tips for Using and Choosing Your Poles: Two Poles or One?
Additional trail tips for Ha Ling Peak
Ha Ling Peak is a classic “first summit” many people tackle when visiting the Canadian Rockies. It is a local favorite, and many people hike or run this trail regularly year-round. As a result, it is always well packed down, and there’s little chance of getting lost.
The views from the top are spectacular, and you don’t have to reach the summit for great views. Plus, the trail has several viewpoints along the way if you have an energy crash part way up or realize the trail is too challenging.
Read More: Why Use Snowshoes on Your Next Mountaineering Adventure
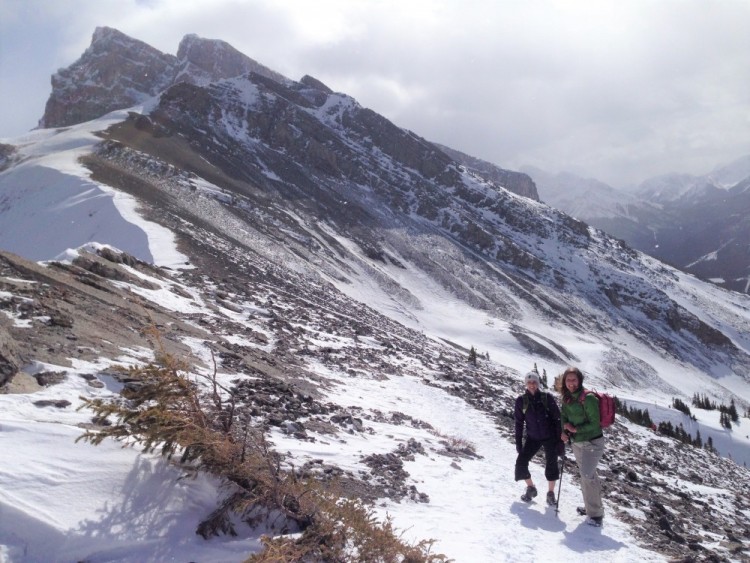
Canmore is a fabulous destination to visit in winter. Here is the saddle on the Ha Long Trail. Photo: Tanya Koob
2. Grassi Lakes
Length: 4.3 km round trip (2.7 mi)
Difficulty: Easy
Once the trail has re-opened from construction, try out the popular Grassi Lakes for an easy outing. Make sure you choose the “easy trail,” a wide road. The more challenging trail is for use in summer only.
You’ll want ice cleats or spikes for this route. It will be well-packed down, so you should not need snowshoes.
Read More: 3 Fall Hikes in the Canadian Rockies
3. Grotto Canyon
Length: 4.2 km (2.6 mi) round-trip
Difficulty: Moderate
Other great hiking options are available if you’re staying in Canmore and want to get out for a walk but don’t quite feel like climbing a mountain.
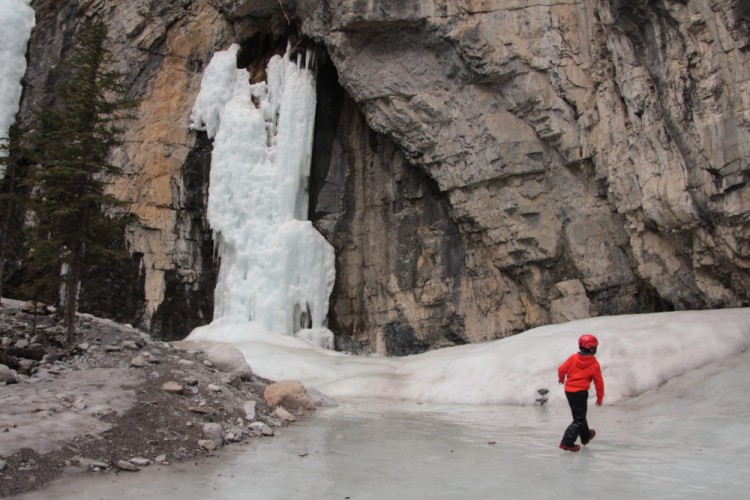
Highlights of the Grotto Creek Canyon Trail include frozen waterfalls and the opportunity to hike on a frozen canyon floor of solid ice. You’ll want ice cleats or Kahtoola Microspikes for this route and should not need snowshoes.
Read More: How To Choose a Trail: Tips for Learning When You Need Snowshoes
Winter Hiking & Snowshoeing around Banff
Are you looking for a few more accessible trails? Then, check out these options in Banff.
This section includes the following trails:
1. Sulphur Mountain and Banff Gondola
2. Johnston Canyon
3. Sunshine Meadows
1. Sulphur Mountain and the Banff Gondola
Length: 5 km (3.1 mi) one-way
Difficulty: Easy-Moderate
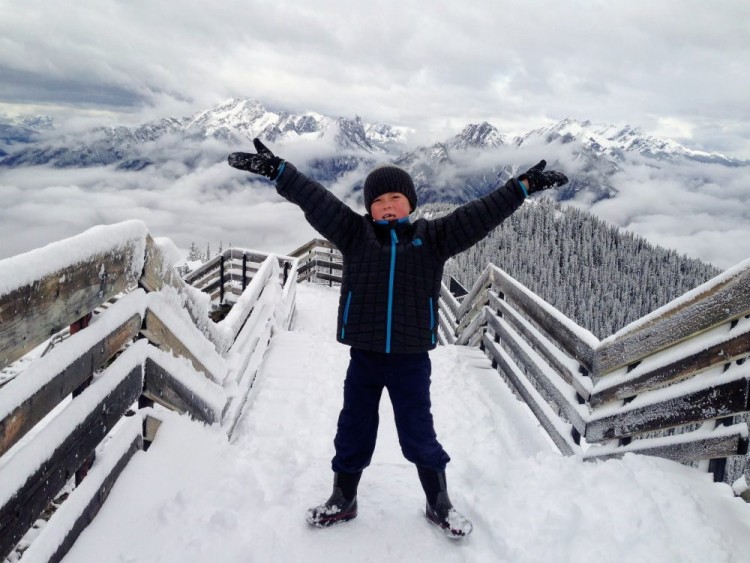
Moving west towards Banff, I love hiking to the top of Sulphur Mountain in winter because you can ride down on the Banff Gondola for free if you’ve hiked up.
You’ll definitely want ice cleats or Kahtoola Microspikes for this hike. Also, make sure you bring some money for coffee or lunch on top of Sulpher Mountain at the café. In addition to the cafe, there’s an incredible interpretive museum up top that children will love.
The hike up Sulphur Mountain is approximately 5 km (3.1 miles) one way with around 700 metres (2297 feet) of height gain. The trail is well switchbacked and never overly steep. Most parties should make the hike up in 2.5 hours, which is in time for a nice lunch at the summit.
How often do you climb a mountain and get a free ride without hiking back to the bottom? I also don’t know too many hiking trails with a coffee shop on top.
Read More: Celebrate a Mountain Christmas in the Canadian Rockies
Additional trail tips for Sulphur Mountain and the Gondola
Check the Banff trail report before driving to the trailhead for this one. They may close the trail if conditions are exceptionally high for avalanche risk. Usually, though, it is open through the winter.
Read More: Snowshoe the Canadian Rockies: Banff National Park
2. Johnston Canyon
Length:5 km (3 mi) round-trip
Difficulty: Easy
The trailhead for Johnston Canyon is half an hour west of the Town of Banff on Highway 1A. It’s easiest to take the TransCanada Highway to Castle Junction and backtrack on the 1A.
There is a large parking lot here, and this is one of the most popular trails in Banff! You won’t be alone on this trail unless you choose a day when it’s -30C (-22F) – which I have done, and it was very peaceful.
The trail visits two sets of gorgeous waterfalls for a quick trip. You can reach the Upper Falls in just over 5 km (3 miles) round trip, and the elevation gain is only 200 metres (700 feet). Thus, this is an excellent hike for the whole family or friends who don’t hike a lot in winter.
Read More: A Winter Explorers Guide to the Best of Banff National Park
Additional trail tips for Johnston Canyon
This hike is a popular choice; my only complaint is that it often feels quite busy. Go early in the day if you want to start before the crowds. The waterfalls are spectacular; you can crawl through a small cave to view the first set of falls. The creek is also quite beautiful, with many smaller frozen cascades.
You’ll definitely want ice cleats or Kahtoola Microspikes (read our review) because the trail gets very packed down and icy. Don’t wear snowshoes because there are several metal catwalks you’ll have to cross, and they are more accessible with the ice cleats.
Read More: Frozen Waterfalls and Ice Walks in Banff National Park
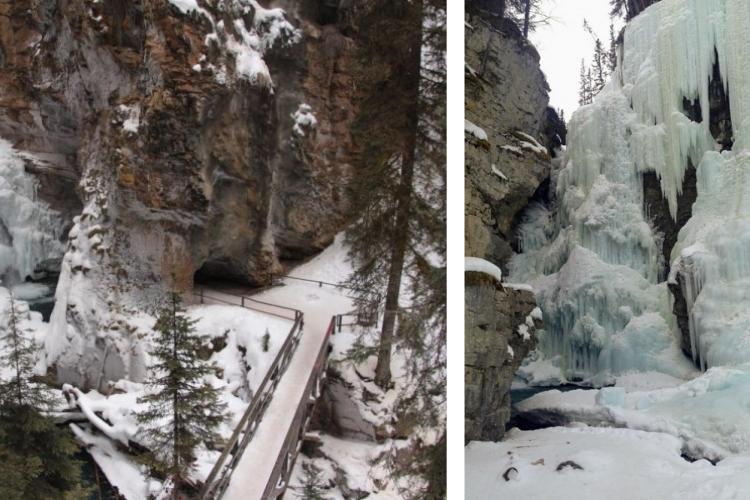
L: Metal catwalks, frozen waterfalls, and a cave make the Johnston Canyon Trail a crowd-pleaser. R: The beautiful Upper Falls of Johnston Canyon in winter. Photos: Tanya Koob
3. Sunshine Meadows
Length: varies
Difficulty: Easy
If you’d like to join a guided snowshoe hike, I highly recommend a guided hike to Sunshine Meadows at the Sunshine Village Ski Resort.
There are both hosted trail walks and private tours. I took the tour through White Mountain Adventures, where I enjoyed a scenic gondola and a chairlift ride to reach a viewpoint above Rock Isle Lake. Then, there is an easy hike down to the lake and back to the Village with the potential for cheese fondue in the hotel lounge in the upper Village.
Check the trail reports if you want to explore the trails independently at Sunshine Meadows.
Read More: Snowshoe and Ski Vacations for the Whole Family at Sunshine Village Resort
Winter Hiking & Snowshoeing Around Lake Louise
Lake Louise has many fun winter activities, including the trail below.
1. Lake Louise Lakeshore Trail (Hike + Skate Combo)
Length:4 km (2.5 mi) round-trip
Difficulty: Easy
Bring your snowshoes and ice skates for a rare opportunity at Lake Louise Lakeshore Trail! First, skate on a gorgeous mountain lake, then hike to the far end of the lake to see frozen waterfalls 100 metres (328 feet) tall. The hike is entirely flat as you walk across the snow-covered lake.
You can also cross-country ski across the lake, and there’s a fun sledding hill beside the lake for the children.
Read More: Winter Guide to the Best of Lake Louise, Banff National Park
Additional trail tips for Lake Louise
There’s a reason Lake Louise is a major tourist destination. On a bluebird day, you’ll be awe-struck by the views of Mt. Victoria and the glacier at the far end of the lake. Unfortunately, the lake only gets a few hours of sunshine in the winter, so make sure you time your visit to arrive mid-morning before the lake falls into shadow by afternoon. I took most of my best photos around 11 am.
Parks Canada lists many other day hikes in the area that are popular for snowshoeing and winter hiking. However, some trails have avalanche danger when conditions are high, so it’s always a good idea to stop at the Visitor Centre in the Village for up-to-date information.
Read More: Photography on Trail: Make Memories With Beginner Outdoor Photo Tips
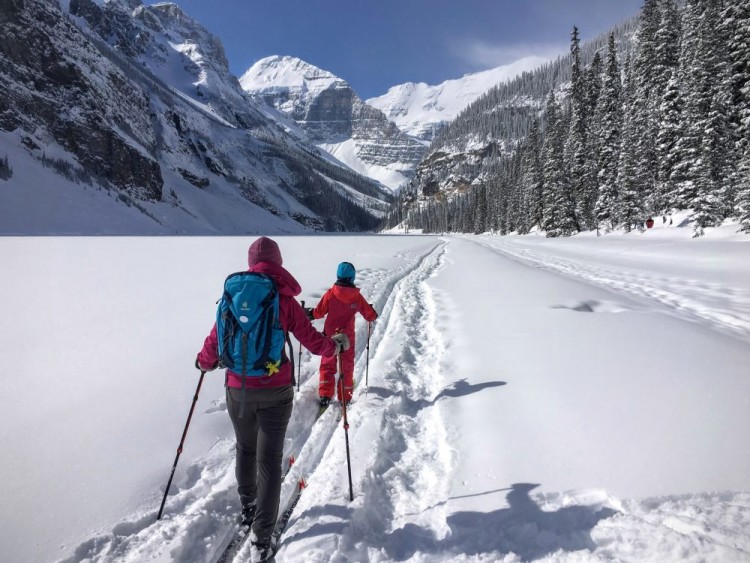
Hike or ski across Lake Louise with views of Mount Victoria and glaciers all around you. Photo: Tanya Koob
Winter Hiking in Yoho National Park
Explore some easy-moderate hikes in Yoho National Park.
This section includes the following trails:
1. Emerald Lake and Hamilton Falls
2. Wapta Falls
1. Emerald Lake Trail and Hamilton Falls
Length:5.3 km (3.3 miles) total for Emerald Lake, 2 km (1.2 mi) round-trip for Hamilton Falls
Difficulty: Easy
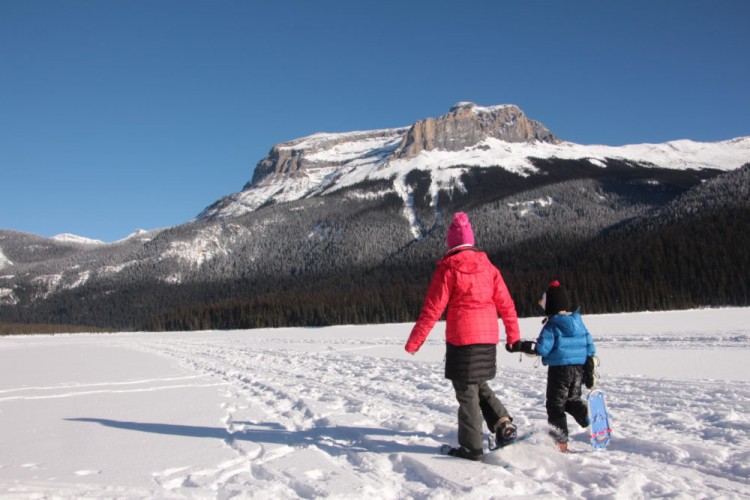
From Lake Louise, it’s only a 30-minute drive to Emerald Lake Trail in Yoho National Park. This beautiful lake is an excellent destination for a leisurely snowshoe hike. The loop around the lake is only 5.3 km (3.3 miles) with no height gain.
Read More: Start ’em Young: Snowshoes for Kids Two to Teens
Additional trail tips
After you’ve hiked around Emerald Lake, you can also hike up to Hamilton Falls in a 2 km (1.2 miles) round trip. If you consult the map, you’ll also see a short trail leading across a bridge to “Peaceful Pond” behind the Emerald Lake Lodge. Peaceful Pond is a short trail, but you’ll get lovely photos on the bridge, where it’s a true winter wonderland.
I especially love Emerald Lake because you get all the scenery of Lake Louise with only a third of the crowds. For example, hike up to Hamilton Falls or start walking around the lake, and you’ll likely only see a few other small groups of hikers.
Also, there’s a fantastic lodge here that you should consider spending at least a night at if possible. The lodge offers a luxurious stay in one of their cabins with gourmet meals in the dining room (not included in the price.)
Read More: Winter Guide To Yoho National Park, British Columbia, Canada
2. Wapta Falls
Length:8.7 km (5.4 mi)
Difficulty: Easy-Moderate
From Lake Louise, it’s about a 45-minute drive to the turn for Wapta Falls as you head towards the Town of Golden.
In the winter, you can only drive as far as the side road that leads to the trailhead. Thus, you have to hike an extra 2 km (1.2 miles) to reach the trailhead for a total distance of 8.7 km (5.4 miles) round trip from the highway.
When you park at the entrance to the turnoff for Wapta Falls, there’s only space for a few vehicles. The start of the hike is easy, and the broad road is flat. Once you reach the official trailhead, you’ll begin to climb a bit.
However, the trail is never steep until you reach the final descent down to the river and the waterfalls. There are only 126 metres of height gain (413 feet), so this is an excellent hike for the whole family.
Wapta Falls are seriously gorgeous, the hike is easy, and you can walk right up to the falls when they’re frozen. The snowy mound in front is also fun to play around on. All in all, this is one of my favorite hikes in the Canadian Rockies for a relaxed, fun day.
Read More: Winter Apres Snowshoe Tours Across Southern AB and BC
Additional trail tips for Wapta Falls
Snowshoes are recommended unless the trail is well-packed down when wearing ice cleats, or Kahtoola Microspikes may be more manageable. Furthermore, you’ll want a grip on your feet on the final hill down to the river. Consider bringing a rolled-up crazy carpet as well if you’re going to play around on the big snowy hill in front of the falls.
Read More: 10 Tips for Making Snowshoeing Fun with Kids
Other Areas to Explore in the Canadian Rockies this Winter
Explore the Icefields Parkway! There are many beautiful hikes along the Icefields Parkway between Lake Louise and Jasper National Park. My favourite stops include Mosquito Creek, Peyto Lake, Bow Lake, Panther Falls, the Columbia Icefields Centre, and Tangle Falls.
Head south to Waterton Lakes National Park, where you’ll find solitude for days!
Drive north to Jasper National Park, where you’ll find beautiful snowshoeing and ski trails in a quieter town that’s more off the beaten path than Banff.
Head west to the Kootenay Rockies of British Columbia and Radium Hot Springs for a few days of soaking and hiking.
Would you snowshoe any of these winter trails? What are your favorite trails in these areas of the Canadian Rockies? Share your thoughts with us in the comments below.
This article was originally published on December 27. 2019, and was most recently updated on September 27, 2022.
Read Next: The Best Backcountry Basecamps in the Canadian Rockies (No Tent Required)


Leave a Comment