Technology is a wonderful thing, but the ornery Luddite market is not the only reason maps, and compasses continue to be manufactured. Just ask any thru-hiker. Traditional wooden snowshoes are made for incredibly useful reasons. Moreover, with a little preventative maintenance, an owner of a pair of traditional snowshoes can reliably expect years of their unique function and aesthetics to continue. Here’s our guide for how to care for your traditional wooden snowshoes.
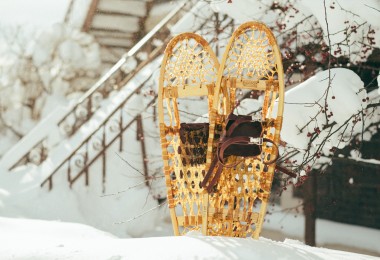
After acquiring a pair of traditional wooden snowshoes—be they a brand new pair from a manufacturer or retailer, or a used set purchased at auction or an antique shop—it is essential to care for them, by weather treating them before use and subsequently between seasons.
Read More: Traditional Wooden Snowshoes: Shapes, Designs & Names
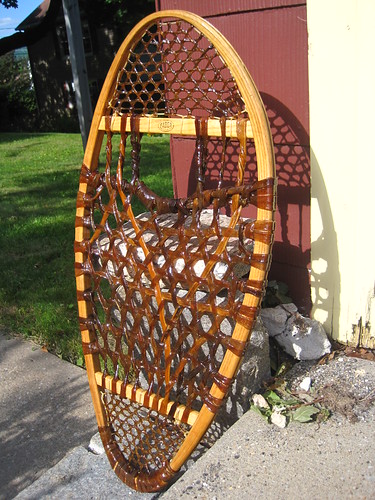
This treatment consists of light sanding and lacquering with spar varnish. Using this technique helps limit the entry of moisture to the frames and webbing. By limiting moisture, it avoids added weight during use through soaking the wood and babiche. It also prevents long-term damage caused by repeated swelling and drying.
Items & Steps To Care For Your Traditional Wooden Snowshoes
The treatment process requires a well-ventilated work area and the following items:
- 150 grit sandpaper
- Tack cloth
- Latex or nitrile gloves
- A flat-head screwdriver
- A paint stirrer
- Spar/marine varnish
- Foam brushes
- A drop cloth
- Two saw horses or their equivalent
A day with low relative humidity is an ideal one to begin the process as it will allow the varnish to set more quickly.
- Begin by giving your snowshoes a close look with the sandpaper in hand.
- If you spot any splinters on the frame or rough patches in the existing varnish, give them a light rub without being overly aggressive. The goal is to create a smoother surface for the application of the varnish, not to remove every single blemish and imperfection.
- When you are satisfied that your sanding is done, use the tack cloth to remove the dust before moving on to the application of the spar varnish.
- Arrange the saw horses atop the drop cloth at a distance from one another that will support both ends of your snowshoes.
- Put on a pair of gloves before opening the spar varnish with the screwdriver.
- Give the varnish a gentle stir with the paint stirrer but avoid the creation of bubbles.
- Lay the snowshoes flat on the saw horses and begin to apply the varnish. The goal is to apply a thin and uniform layer of varnish.
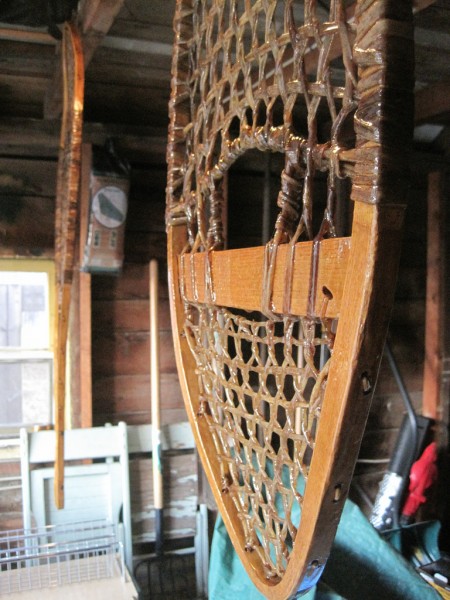
- Avoid overloading the brush with varnish and work steadily enough to ensure full coverage. Be especially attentive to the toe and heel bars (the two wooden slats running between the frame) and the toe cord (the thick portion of webbing below the toe bar). These areas receive more wear and tear in the course of use.
- Also, be sure to lacquer between and underneath the webbing on the inside of the frame.
- You may choose to either apply lacquer to a single side of your snowshoes and allow them to dry atop the sawhorses before flipping them over and repeating the process. Or you may lacquer both sides of your snowshoes on the same day and then hang them to dry.
Following Sanding & Lacquering Treatment
Given low relative humidity and moderate temperatures, the lacquer should set within three days. However, in humid or cool conditions, more time should be allowed.
Check on your snowshoes during the first day of drying to ensure that no large bubbles have formed anywhere.
If they have, give them a gentle rub with a small piece of sandpaper. Otherwise, the varnish inside the bubble will be very slow in drying. It may create the potential for a bare spot in the varnish at a later date.
After the first coat of varnish has set, repeat the steps above, including gentle sanding as needed.
A third coat of varnish would not be overkill and is recommended for newly acquired snowshoes. After the third coat is set, your traditional snowshoe racquettes should be good to go for the upcoming season! Do, however, seal up any leftover varnish well and keep your materials tucked away in an accessible place. On occasion, you may need to touch up any dings during the winter.
Tips For Day-to-Day Traditional Wooden Snowshoe Use & Care
The weather treating of wood-framed snowshoes is the only time-intensive preventative maintenance required. It is nonetheless to keep some things in mind throughout the day-to-day use of wood-framed snowshoes in season.
Bridging Debris
Wood frames bear far less weight than do aluminum frames on uneven terrain. Bridging boulders and deadfall may have become second nature for long-time users of aluminum frame snowshoes. However, users of wood-frame snowshoes should be much more conservative when bridging debris.
Proper Storage
Proper storage between uses in season is also important for the long-term health and care of traditional wooden snowshoes. Do not leave your racquettes in your car or truck or strapped to your snowmobile between uses. Ideally, they should be stowed in a relatively warm and airy area after removing any slush, grime, and salt from them with a damp cloth. Proper storage limits corrosion and allows for the evaporation rather than the freezing of moisture, both of which contribute to cracks in the frame and degradation of the webbing.
Proper storage of traditional snowshoes between season consists of three steps.
- First, give them a proper wet cleaning beyond the between-use rubdowns with a damp cloth. Allow them a few days to thoroughly dry.
- Next, locate an airy storage space that experiences a minimum of temperature variation and never becomes truly hot.
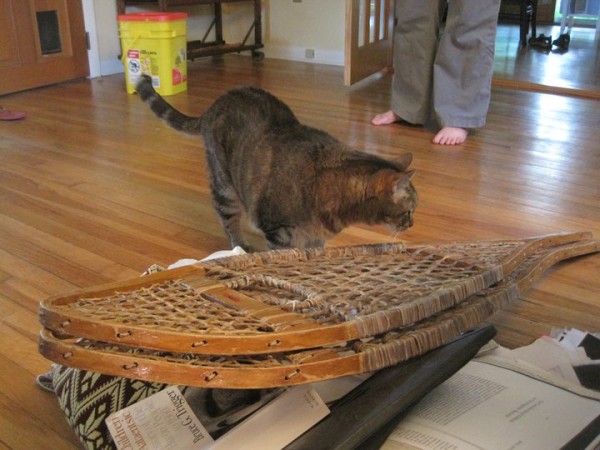
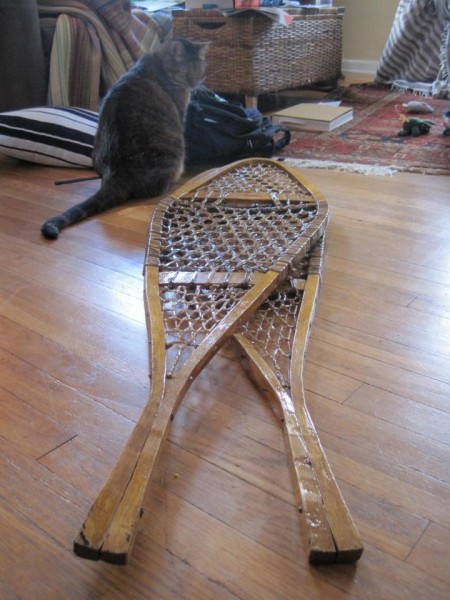
- Finally, keep your snowshoes inaccessible as possible to critters. Many critters have chewed through wood frames as they consider babiche to be a tasty treat. Two ways of keeping your snowshoes inaccessible are by suspending them, or by wrapping them with canvas. Or my cat, Bailey, illustrates a third way in the accompanying photo.
When autumn rolls around with a nice low humidity day, bring your wooden snowshoes back out into the light and begin the annual care round anew!
Read More: Hanging Snowshoes Up For The Season



Heya all I just stumbeld onto a pare of wood senew as brand-new snowshoes beauty’s and then this site thanks to all, may peace strike us one day Gday Gerard from the Netherlands
Anytime, Gerard. We’re glad to hear that this article was helpful, and we hope you enjoy your pair of wooden snowshoes! -Susan, Snowshoe Mag Editor
I just purchased two pairs of traditional snow shoes and googled for a refurbishing method. It brought me to your site. I want to thank you for posting your procedure of what to do between seasons and care. I will enjoy the upcoming Canadian winter ahead. Cheers.
You are very welcome Gerald! We’re glad that you enjoyed the post and hope that your new snowshoes allow for excellent adventures this winter 🙂
If I can ask another question: Im considering putting in studs for better traction on slopes. I found a set that are designed to be bolted thru the wooden frame cross pieces. I’m concerned doing this may be too risky to the frame’s strength. What’s your feeling toward this? Thanks, Gary
I personally would be nervous about it, and for the same reason. I have never used them myself, but one option is a removable crampon such as these two:
– http://www.hscind.com/zencart/index.php?main_page=product_info&cPath=3&products_id=9
– http://www.snowshoecrampons.com/
There are also some bindings out there that incorporate a crampon. I haven’t used one of them, either, but I feel like the binding crampons on my aluminum frame snowshoes do less work than the rear crampon. It’s great to have both on those days when grip is needed, but if I had to choose one or the other it would be the rear crampons. Others may have differ, of course!
Great article I love wooden shoes and have 3 pairs. I also have an ABS pair that Ilike inthe Barrenlands where the snow is usually well crusted and you really only need small shoes to prevent breaking the crust. Spar Varhish is great stuff and I use it on many things like wooden knife handles and my kayak paddles. Cheers, Greg
Glad you enjoyed it! Most of the snowshoeing I have done has been in the uplands of Southern New England and eastern New York and going up and down on crust is pretty common. It saves a lot of energy when I can manage not to break through!
Great article thank you the help. My shoes soaked up water yesterday after 4 hrs in the woods. The rawhide loosened and edges turned white. Just bought them 4 weeks ago and didn’t know I had to treat them yet. I Dried them & bought the varnish yesterday. I’ll put the first coat on tonight. Thank you for the advice!!
Gary
Great—happy the piece was able to be of use to you! Just make sure they’re good and dry before you start to treat them. Otherwise the varnish won’t adhere very well at all.